
New Supervoice Trunk
To connect your Supervoice Trunk to GS Wave by using the predefined list of VoIP Providers you need to follow these steps:
1. Download and install GS Wave depending on your phone's operating system
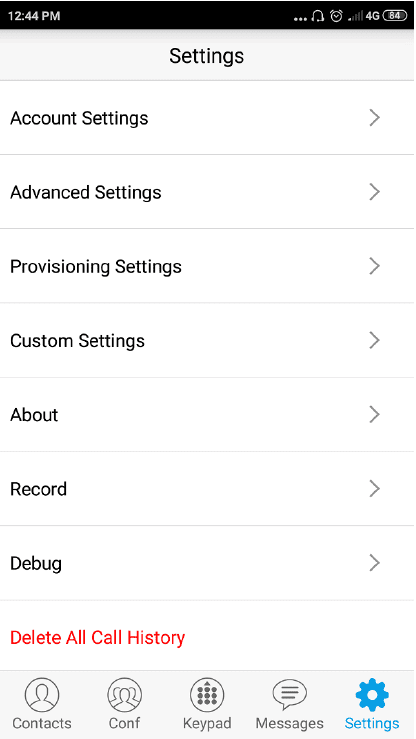
2. Go to the GS Wave app on your mobile and click on Settings

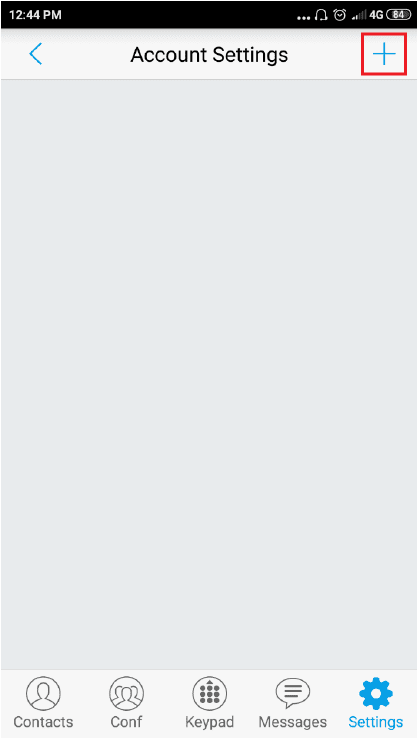
3. Click Account Settings
4. Select the + at top right on your screen

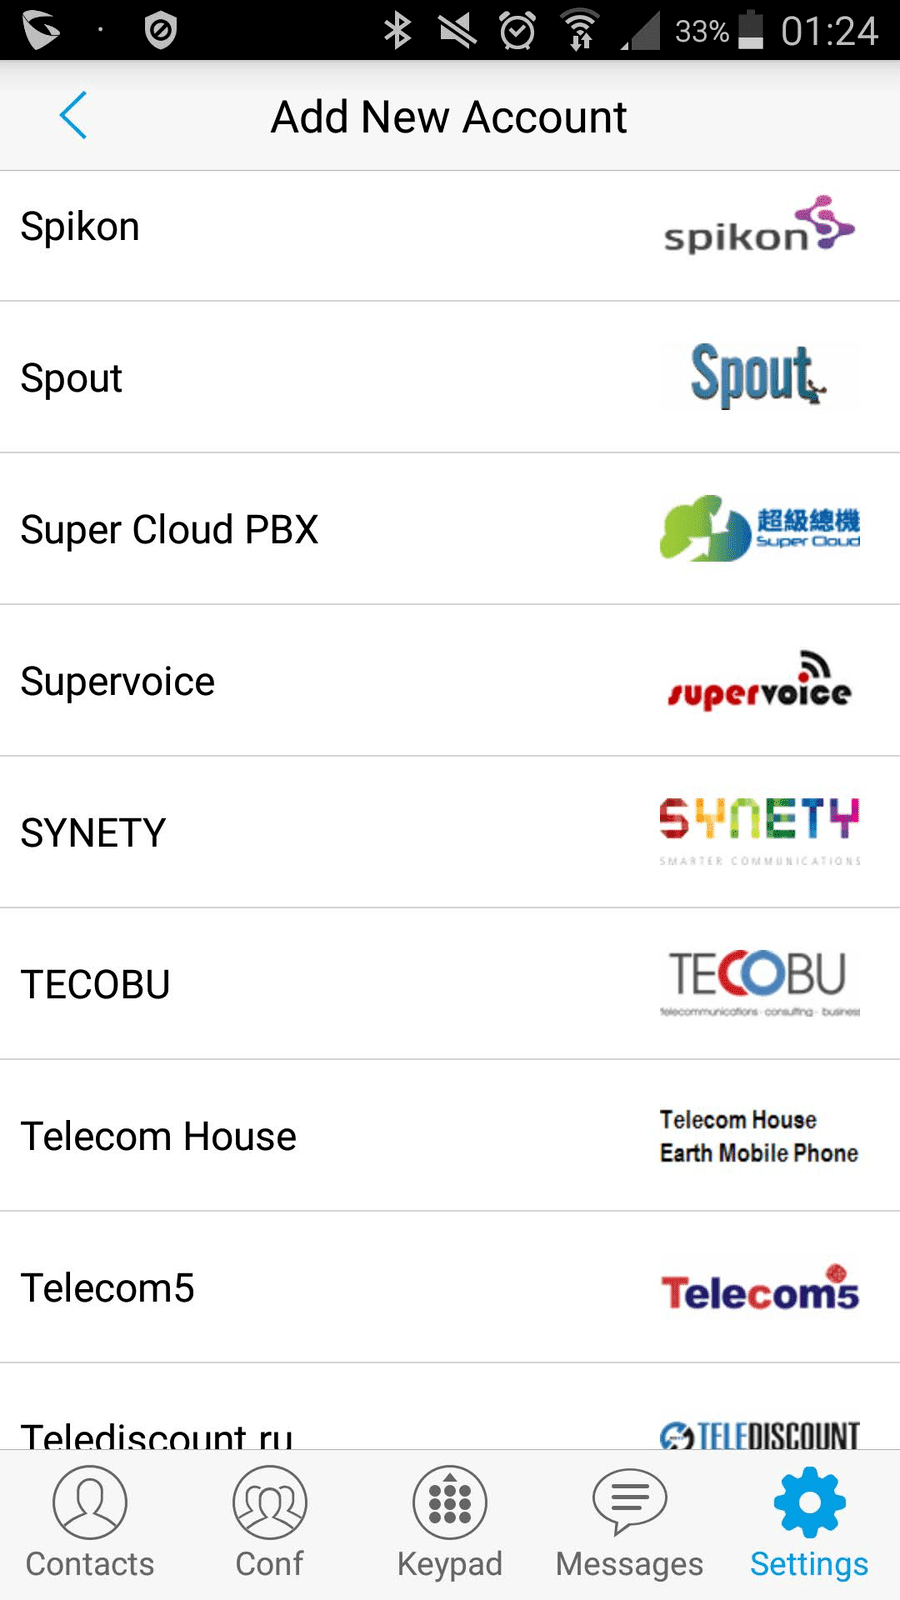
5. Scroll down through the VoIP Providers list till you find Supervoice and select
6. The SIP Server portion will be prefilled
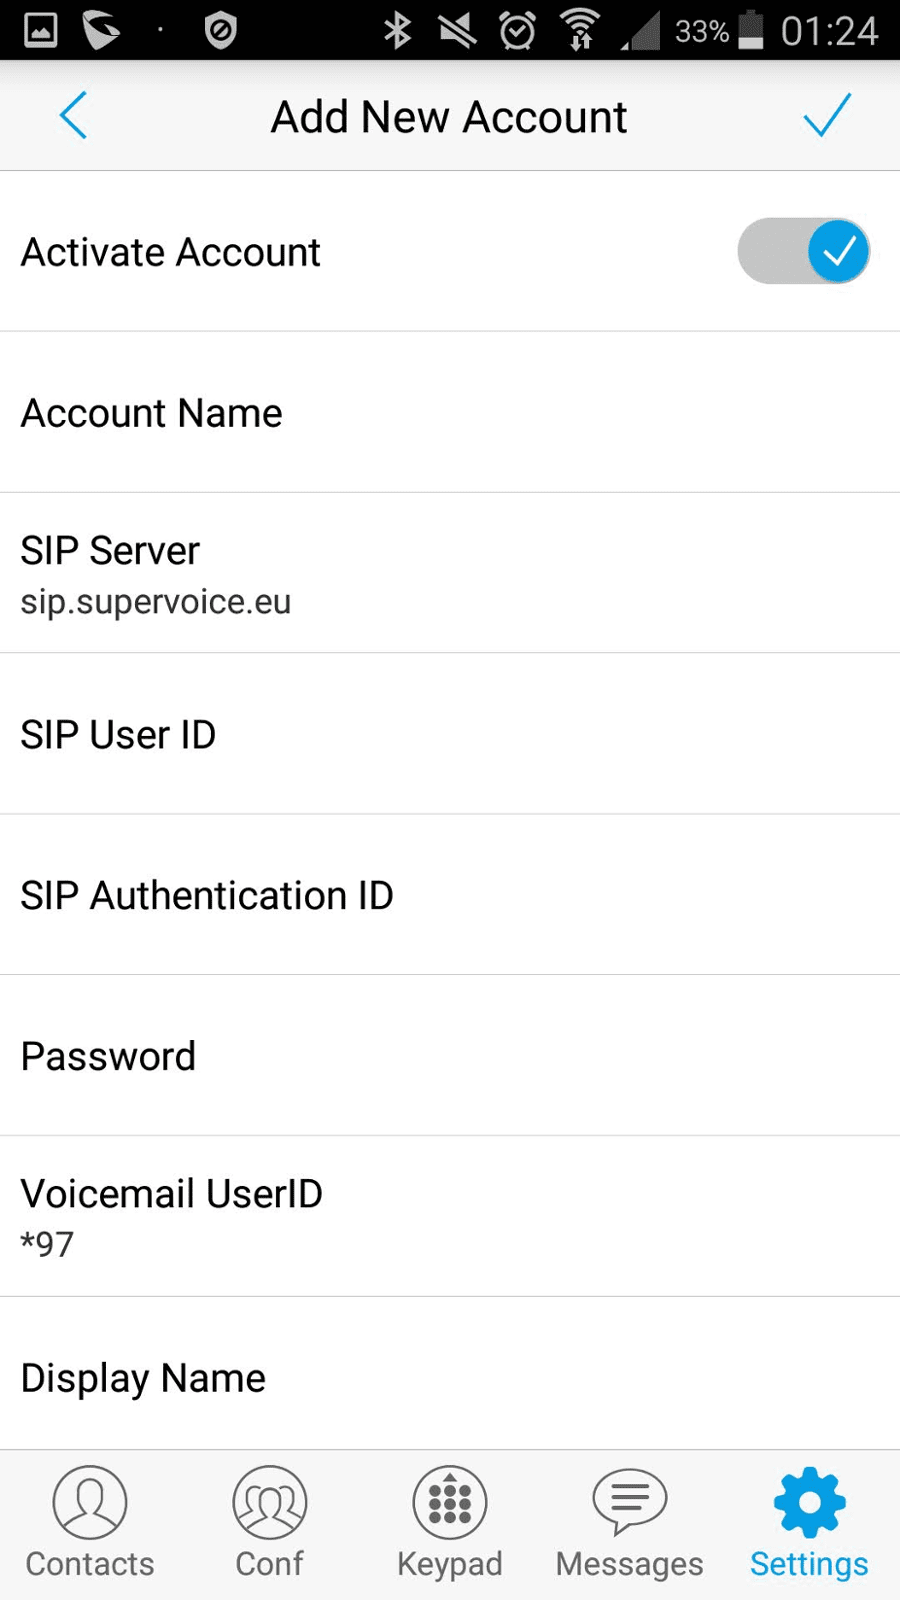
7. Then in the SIP User ID and in the SIP Authentication ID you will enter the username that has been sent to you via email. Respectively, below you will enter the Password that has been sent to you via SMS.
8. After completing this information, go back to Account Settings and you will see that the indication next to your Account ID will be red. Give it a few seconds and if the credentials are correct the indication next to your Account ID will be green, since TLS is already enabled on the account.
9. For outgoing calls via SuperVoice SIP Trunk, you have to dial destination number in E164 format. In case of international calls you have to dial the number without the prefix 00 and in case of national calls you have to dial the number with prefix 30. For example, in order to call number 2107100000 you must dial 302107100000.
For your convenience, you can change Dialplan Settings in the Call Settings section so you don’t have to dial in E164 format. In order to do this, you need to activate Dialplan. After activating dialplan, you can change dialplan settings, as follows:
{ <00=>x+ | <=30>2xxxxxxxxx | <=30>69xxxxxxxx | x+ | \+x+ | *x+ | *xx*x+ }
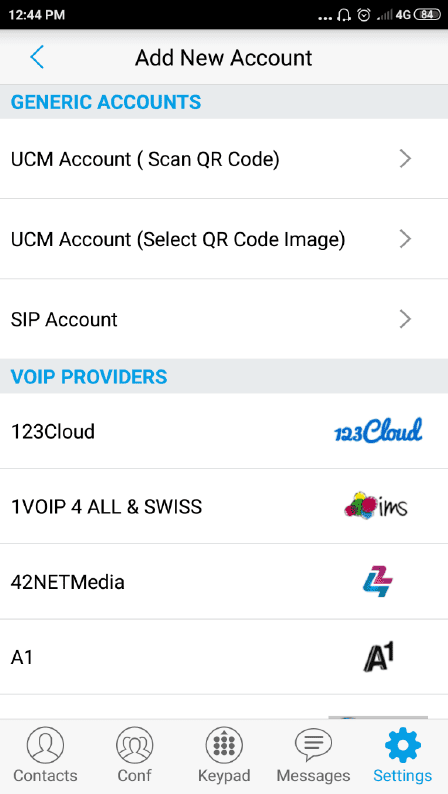
To connect your Supervoice Trunk to GS Wave manually you need to follow these steps:
1. Download and install GS Wave depending on your phone's operating system
2. Go to the GS Wave app on your mobile and click on Settings
3. Click Account Settings
4. Select the + at top right on your screen

5. Go to the SIP Account

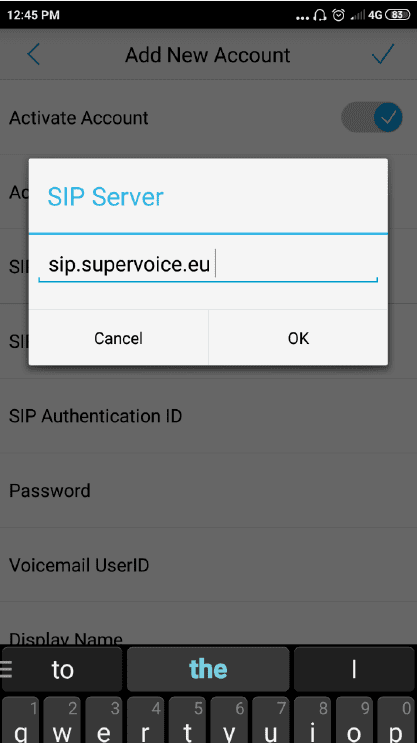
6. Then click on the SIP Server field, a window will appear in which you will write sip.supervoice.eu
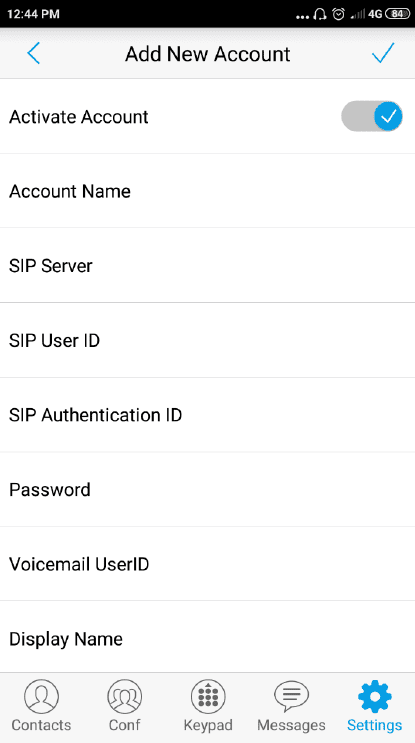

7. Then in the SIP User ID and in the SIP Authentication ID you will enter the username that has been sent to you via email.
Respectively, below you will enter the Password that has been sent to you via SMS.
Respectively, below you will enter the Password that has been sent to you via SMS.
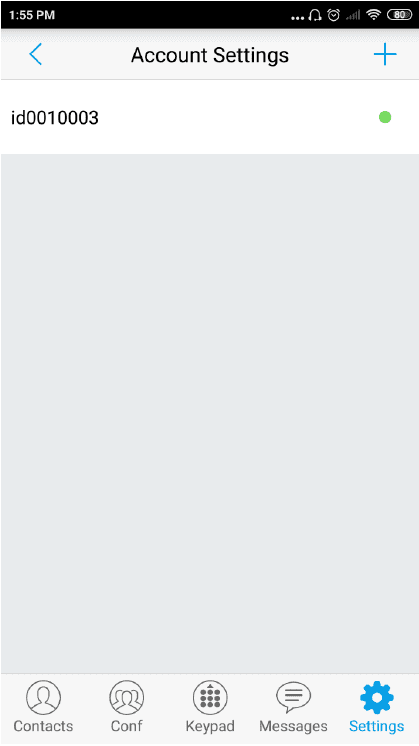
8. After completing this information, go back to Account Settings and you will see that the indication next to your Account ID will be red as in the image below:

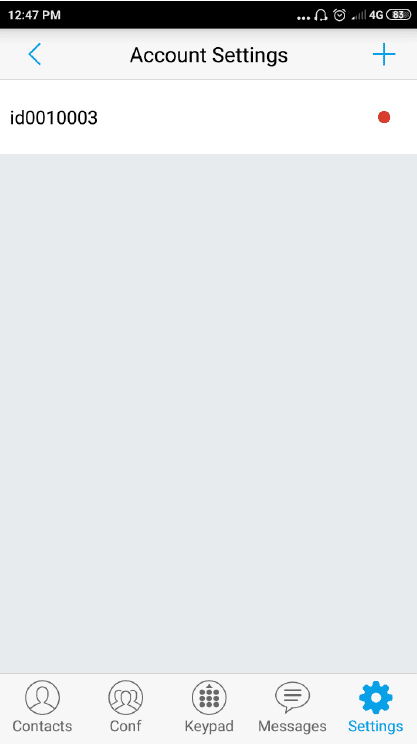
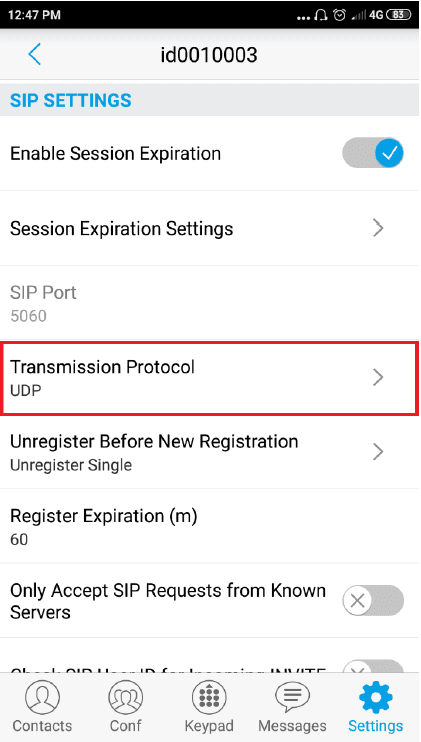
9. This indication indicates that registration has not yet taken place. All that remains to be done is to change the Transmission Protocol from UDP to TLS. Press the Trunk we created and open the sip settings and change the Transmission Protocol from UDP to TLS as in the photo below:

10. Now the light should be green which indicates that the registration was successful.

11. For outgoing calls via SuperVoice SIP Trunk , you have to dial destination number in E164 format. In case of international calls you have to dial the number without the prefix 00 and in case of national calls you have to dial the number with prefix 30. For example, in order to call number 2107100000 you must dial 302107100000.
For your convenience, you can change Dialplan Settings in the Call Settings section so you don’t have to dial in E164 format. In order to do this, you need to activate Dialplan. After activating dialplan, you can change dialplan settings, as follows:
{ <00=>x+ | <=30>2xxxxxxxxx | <=30>69xxxxxxxx | x+ | \+x+ | *x+ | *xx*x+ }