Supervoice Trunk Registration on 3CX
1. Connecting the Supervoice Trunk can be done by using you 3CX FQDN.
2. You must send us by email at [email protected] your 3CX FQDN FQDN that is created during the installation of 3CX and you can see it on the 3CX Dashboard, in order to be added as an accepted FQDN in our systems.
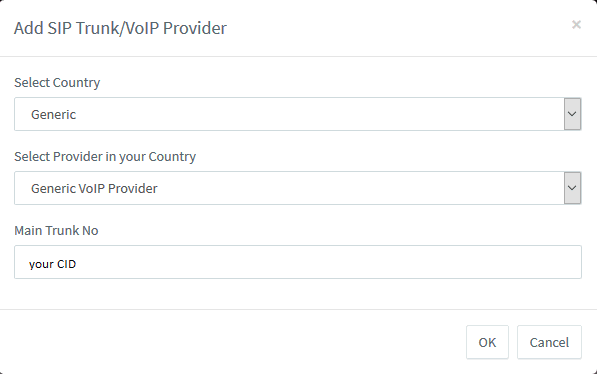
3. Create a new VOIP Provider with the below settings:
4. Then, navigate to your 3CX Web GUI and go to SIP Trunks -> + Add SIP Trunk and follow the screenshots below:
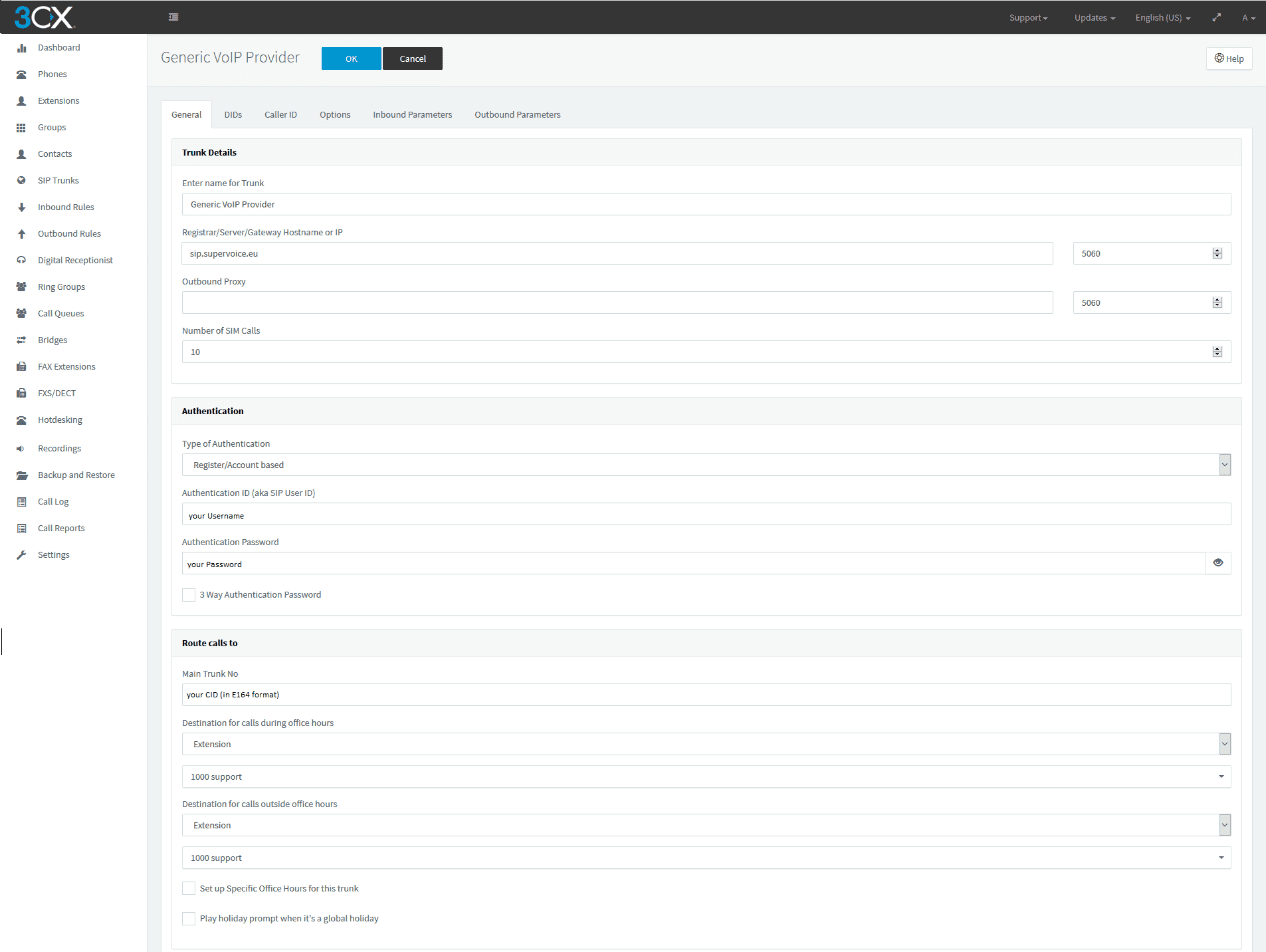
5.Then in the field “Registrar/Server/Gateway or IP”, fill in the value sip.supervoice.eu. In the field “Authentication ID (aka SIP User ID)” fill in your account’s id and in the field “Authentication Password” fill in the password with the values you were provided via email and SMS.
6.Click OK and check the status of your trunk.

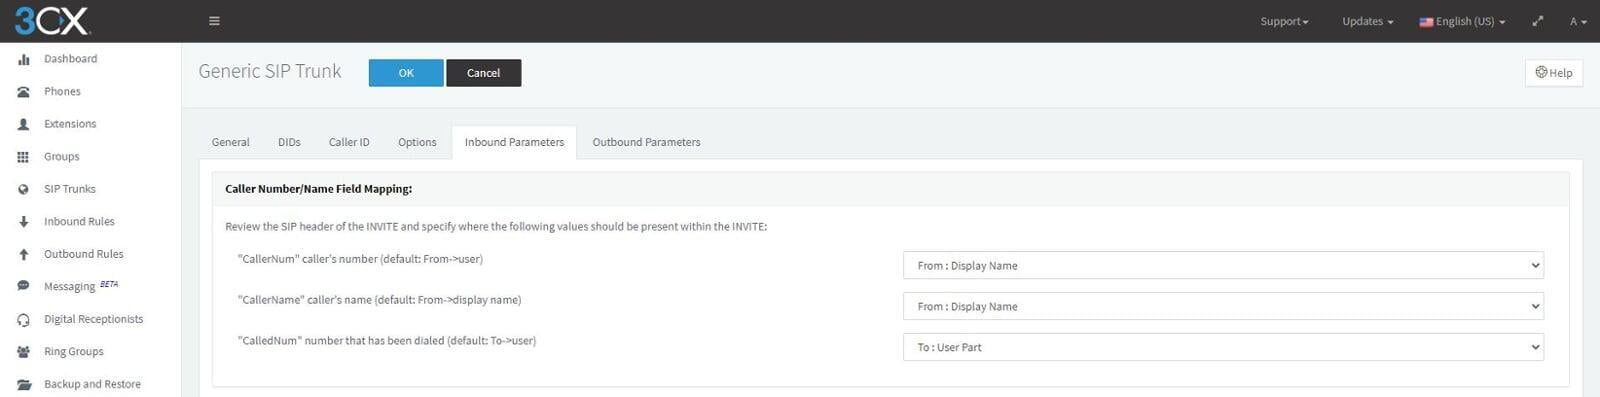
7.For the proper display of the field CallerID you should go to your trunk settings in the Inbound Parameters and in the fields "CallerName" caller's name (default: From -> display name) and "CallerNum" caller's number (default: From -> user) set the setting From: Display Name.
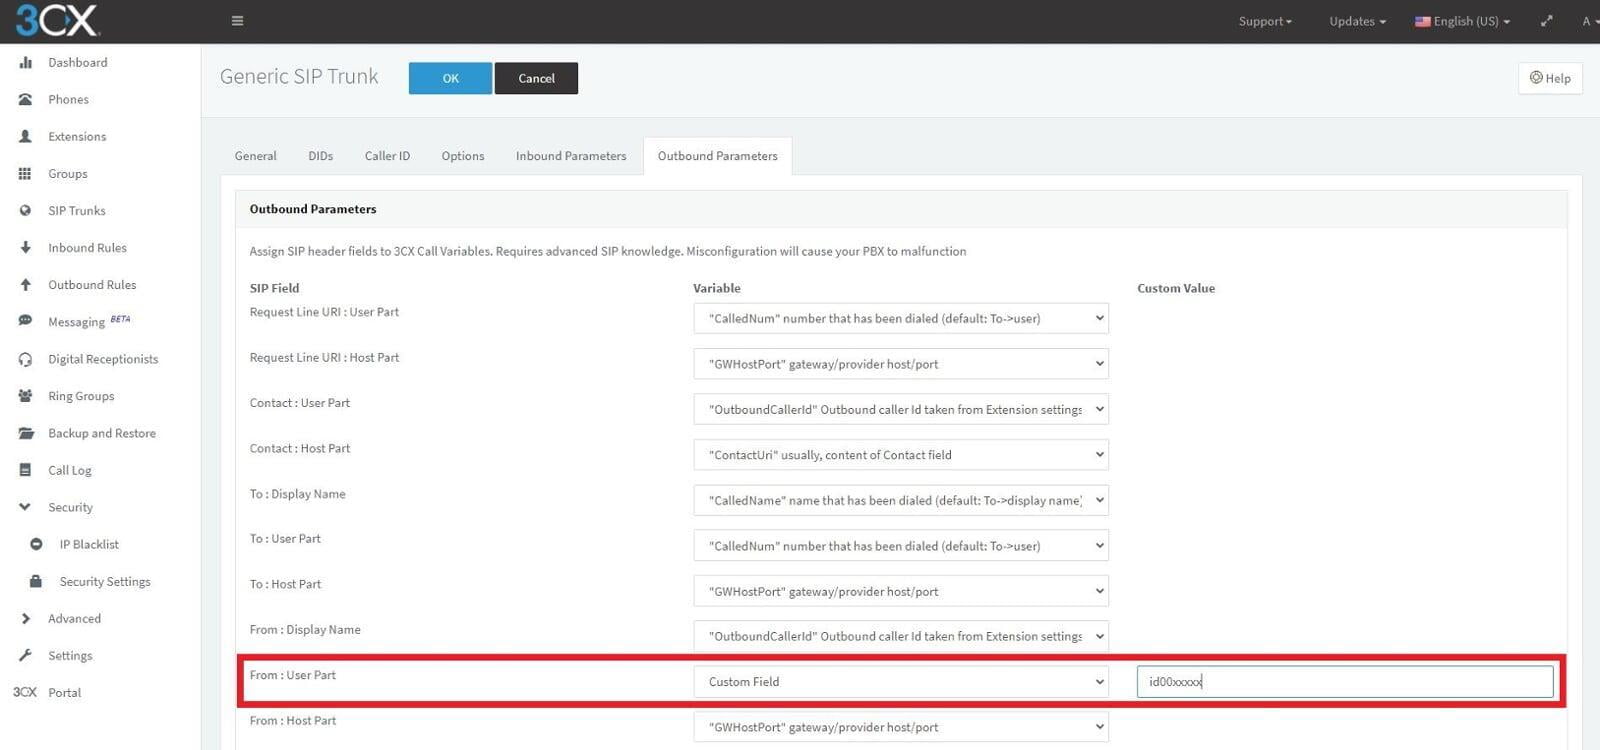
8. For the proper display of your number you should go to your trunk settings in the Outbound Parameters
and to the field From : User Part (default: OutboundCallerid”)to set custom value and at the custom value to put the trunk id
which has been sent to you and it is in the id00xxxxx where x are the trunk id numbers that you have received with email.